|
- One bow frame
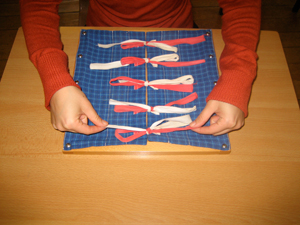
Invite a child to come by telling them you have something to show them. Have the child bring the appropriate dressing frame and have them place it on a specific spot on the table you will be working at. Have the child sit down first, and then you sit down to the child’s right. Tell the child that you will be showing him how to untie and tie the bows.
- Place the frame in a way that the red ribbon is on the right and the white ribbon is on the left.
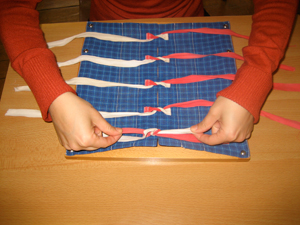
- Pinch the end of the white ribbon with your right thumb and right index finger.
- Pinch the end of the red ribbon with your left thumb and left index finger.
- Simultaneously pull both ribbons moving your right hand to the right and your left hand to the left.
- Pull in a smooth and continuous manner until the bow has been completely undone and the two ribbons are gently taught.
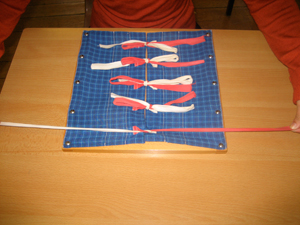
- Unpinch your left fingers and then your right.
- Repeat this first step with the other four bows, moving your way from the top to the bottom bow.
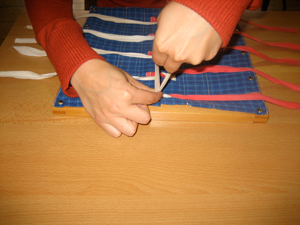
- Place your left index and middle fingers under the red ribbon and on where the white ribbon has been sewn onto the fabric.
- Pinch using your right thumb and index finger the red ribbon where it first meets the white ribbon in the tie.

- Pull the red ribbon out slowly in small increments.
- Once fully out, pinch the end of the red ribbon with your same two right fingers and pull the ribbon to the right and gently taught under the white ribbon.
- Unpinch your two right fingers and move your hand off the frame.
- Lift your two left fingers and pinch the end of the white ribbon.
- Bring the white ribbon to the left and pull it gently taught.
- Unpinch your left fingers.
- Repeat for the other four, working your way from top to bottom.
- Pinch the bottom left part of the right flap with your right thumb and index finger.
- Place your left thumb next your right thumb and your left index finger next to your right index finger.
- Gently pinch with your left fingers and slide them up to the top of the material.
- Rotate the material to the right to open up this flap.
- Unpinch your left two fingers and then your right.
- Pinch the bottom right part of the left flap with your left thumb and index finger.
- Place your right thumb next your left thumb and your right index finger next to your left index finger.
- Gently pinch with your right fingers and slide them up to the top of the material.
- Rotate the material to the left to open up this flap.
- Unpinch your right two fingers and then your left.
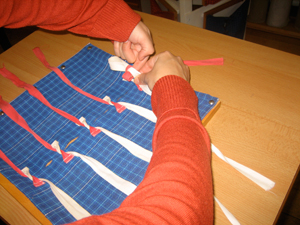
- Pinch the end of the top white ribbon with your left thumb and left index finger and pull the ribbon fully taught to the left.
- Continue this for each ribbon working your way down the material. (At one point you may want to ask the child if he would like to pull one.)
- Repeat this movement using your right two fingers for the red ribbon, this time pulling the ribbon taught to the right.
- Pinch the bottom part of the left flap with your left thumb and index finger.
- Place your right thumb next to your left thumb and your right index finger next to your left index finger.
- Slide your right fingers up the material until they reach the top.
- Rotate the material to the right thus closing the flap.
- Unpinch your right fingers and then your left fingers.
- Pinch the bottom part of the right flap with your right thumb and right index finger.
- Place your left thumb next to your right thumb and your left index finger next to your right index finger.
- Slide your two left fingers up the material until they reach the top.
- Rotate the material to the left, thus closing the right flap.
- Unpinch your left fingers and then your right fingers.
- Pinch the end of white ribbon with your right thumb and index finger and rotate the ribbon over the material to the right so that it lays flat over the red ribbon.
- Unpinch your right fingers.
- Pinch the end of the white ribbon with your right thumb and index finger and rotate the ribbon over the material to the left and place it under the white ribbon so that it lies flat and parallel to the frame’s bottom bar.
- Repeat for the other four making your way down to the bottom.
- Pinch the red ribbon about 1/3 from the edge of the frame with your left thumb and index finger.
- Rotate the red ribbon 90° clockwise.
- Pinch the white ribbon with your right thumb and index finger at about 1/3 from the edge.
- Bring the white ribbon down 90° and push the ribbon through the hole under the red ribbon by guiding it with your right index finger.

- Remove your right fingers.
- Slide your right index finger around to the back side and through the loop of the white ribbon.
- Pinch the ribbon with your thumb and index finger.
- Slide your right fingers up the ribbon to the tip and bring the ribbon back parallel to the frame’s bottom bar.
- At the same time, slide your left fingers along to the tip of the red ribbon and bring this ribbon parallel to the frame’s bottom bar.
- Pull ends taught.
- Unpinch your left fingers and then your right.
- Repeat for the other four.
- Place your two left fingers under the white ribbon about 1/3 from the end.
- Lift the ribbon.
- With your right thumb and index finger pinch the base to create the loop.
- Unhook your left fingers.
- Rotate the loop so that it lies next to the red ribbon,
- Pinch the red ribbon and place it over the white loop near your right fingers.
- Push the red ribbon through under the white ribbon with your left index finger.
- Remove your left finger and pinch the tip of the white loop.
- Release your right fingers and pinch the tip of the red loop.
- In a smooth continuous movement, pull the red ribbon to the right and the white ribbon to the left.
- Pull until taught.
- Unpinch your left fingers and then your right.
- Repeat for the other four working your way to the bottom ribbons.
Offer the child the opportunity to untie and then tie the bows.
Tying one’s own shoelace.
Care of the person and development of independence.
Acquiring coordination of movement.
When the bow comes together in the end.
4-5 years
You may want to ask the child where he has seen a buckle before to have him associate what he is about to do to his clothing.
Share your experiences in the
|